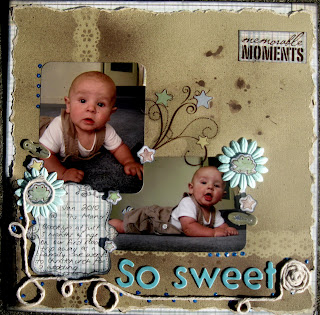
Good day to you wherever you may be! Its a beautiful sunny day here in Nelson couldnt ask for better weather really (well you could ask for it to be a bit warmer but its winter and that would be a little cheeky).
I have another layout to share with you all...taaadaaaa!
This layout has been a tricky one...I wanted to try make it a little different to the norm (of what I normally do) I tried: ripping the edges, sewing the edges (awful shouldnt have used cardstock), gluing on yarn, splodging glimmermist and glimmermisting a pattern onto the paper.
I had a lot of trial and error on this page, at first the glimmermist splodges looked ridiculous! so i dabbed them with my thumb and it toned down the colour and then I lightly sprayed over it, I am happy this had the effect I was after phew.
I attempted to sew around the ripped edges of the cardstock but quickly gave up and used distress ink on the corners where I had already did some sewing...thankgod for distress ink!
I managed to use up some more stickers from my stash that were just lying around waiting to be used...yay! I tried something new I added clear cracked paint to get that old vintagey feel to them, because of the type of stickers they were (plastic like stickers) the cracked paint just flaked off of most of them but owell it was worth a try!
I bought a new gadget called sew easy from artfull crafts which is here, I must admit I was not THAT impressed with it the stitcher is made out of a rubbery plasticy type of material and it really did not do a good job of poking holes in my paper (cardstock) AND on top of that it seemed to wear it down as well...I dont believe I am using it right though because surely this shouldnt happen upon the first use? I dont have the mat that comes with it I just used my cutting mat...maybe the mat is the secret? Has anyone used the 'sew easy' tool successfully and has any tips for me?
looks fabulous - good on you for playing and trying new techniques ... sometimes to get the splodgy effect I take the squirter tube - nozzle thing out and flick or dribble from the bottom of the tube - does that make sense - it doesn't always work just the way you want it do - but by moving a few things around you can cover up so-called mistakes. It's all part of the creative process. Try splodging or spraying with the mist and also dabbing with a tissue.
ReplyDeleteNot sure about the stickers ... but if you lightly sand you can then do your thing with distress crackle paint and that should keep it on their - also try the distress crackle paint dabbed/splodged on the edge of your paper and your photo ...
Have fun.